 Deutsch
 Français
 Русский
%22%20xlink%3Ahref%3D%22%23CW5aYGFvw6_1381%22%2F%3E%20%3Cuse%20width%3D%2230%22%20height%3D%2220%22%20transform%3D%22matrix(-12.33562%20-20.5871%2020.58684%20-12.33577%20240.3%2048)%22%20xlink%3Ahref%3D%22%23CW5aYGFvw6_1381%22%2F%3E%20%3Cuse%20width%3D%2230%22%20height%3D%2220%22%20transform%3D%22matrix(-3.38573%20-23.75998%2023.75968%20-3.38578%20288%2095.8)%22%20xlink%3Ahref%3D%22%23CW5aYGFvw6_1381%22%2F%3E%20%3Cuse%20width%3D%2230%22%20height%3D%2220%22%20transform%3D%22matrix(6.5991%20-23.0749%2023.0746%206.59919%20288%20168)%22%20xlink%3Ahref%3D%22%23CW5aYGFvw6_1381%22%2F%3E%20%3Cuse%20width%3D%2230%22%20height%3D%2220%22%20transform%3D%22matrix(14.9991%20-18.73557%2018.73533%2014.99929%20240%20216)%22%20xlink%3Ahref%3D%22%23CW5aYGFvw6_1381%22%2F%3E%20%3C%2Fsvg%3E) 简体中文
简体中文How to access Darknet via Tor, I2P and Freenet? Guide on OnlineSim
- Sep 14, 2023, 2:28 PM
- 11 minutes
The dark side of the internet, part 5: How to access Darknet via Tor, I2P and Freenet
In this last article in the "dark side of the internet" series, we describe how to configure Freenet, I2P and Tor to gain access to the Dark Web.
Previous articles:
-
The Dark Web, part 1: What is the Dark Web and what is it used for
-
The Dark Web, part 2: How do onion sites work
-
The Dark Web, part 3: What is Freenet
-
The Dark Web, part 4: What is I2P and how it works
-
The Dark Web, part 5: How to access Darknet via Tor, I2P and Freenet ← you are here
How to access Freenet
To use Freenet, you need to download the application from the official Freenet website. It runs under Windows, macOS and GNU/Linux.
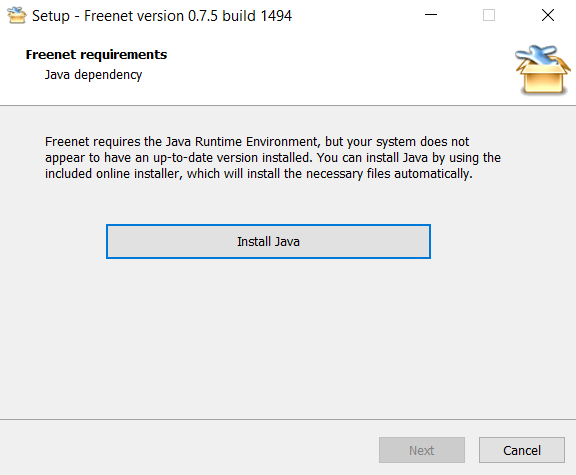
Besides, you will need to have Java updated to the latest version. The Freenet installer will do that for you.
If you can't open the official Freenet site, download the application from the mirrors for regular browsers or from Tor. Note that the latter can only be accessed using Tor Browser.
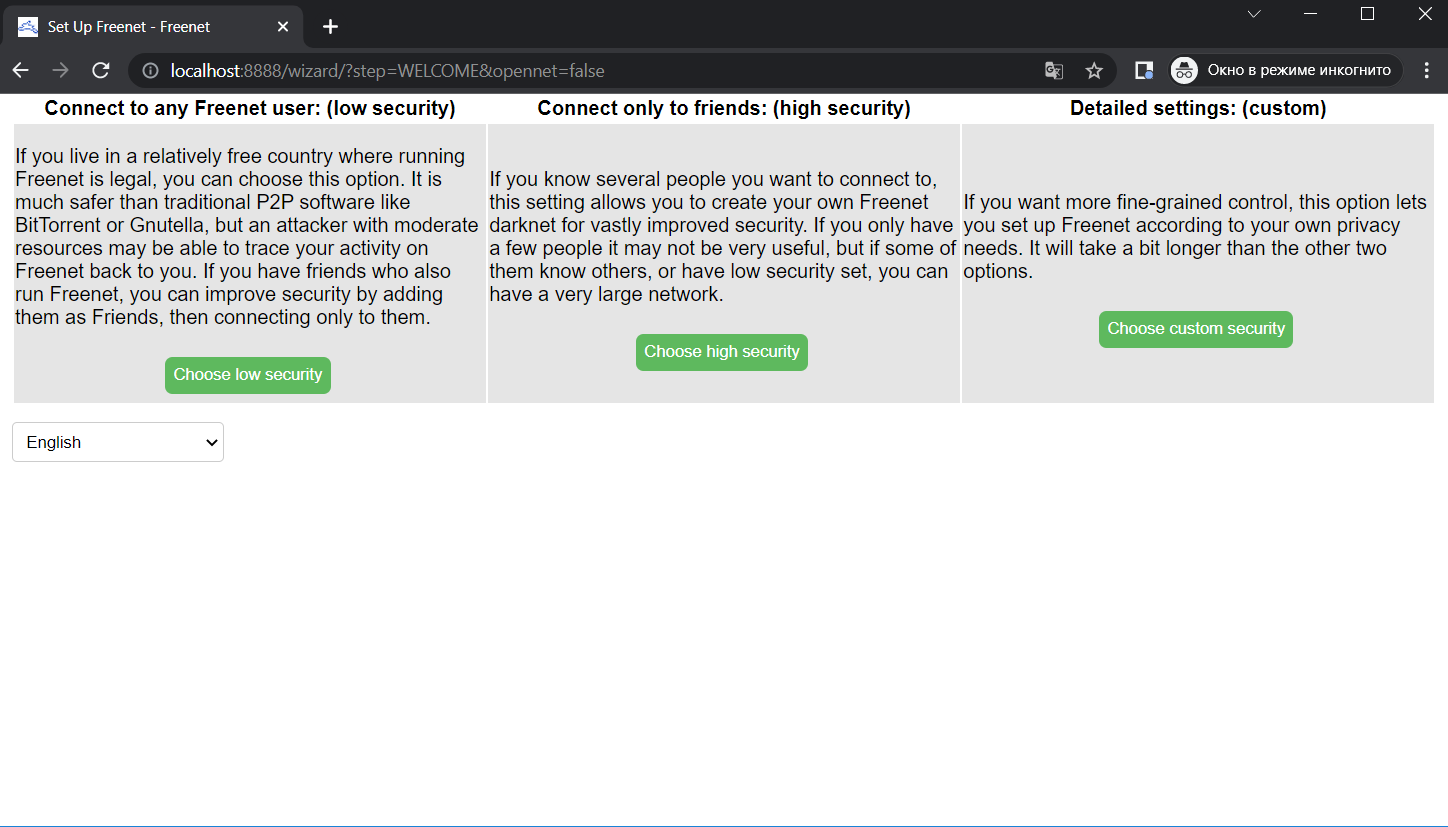
When the Freenet software is installed, it will automatically launch the browser with the installation wizard. It will prompt you to:
-
Choose your Tor security level. At low security, you can connect to any Freenet user, and at high security you can only connect to your friends or specified users.
-
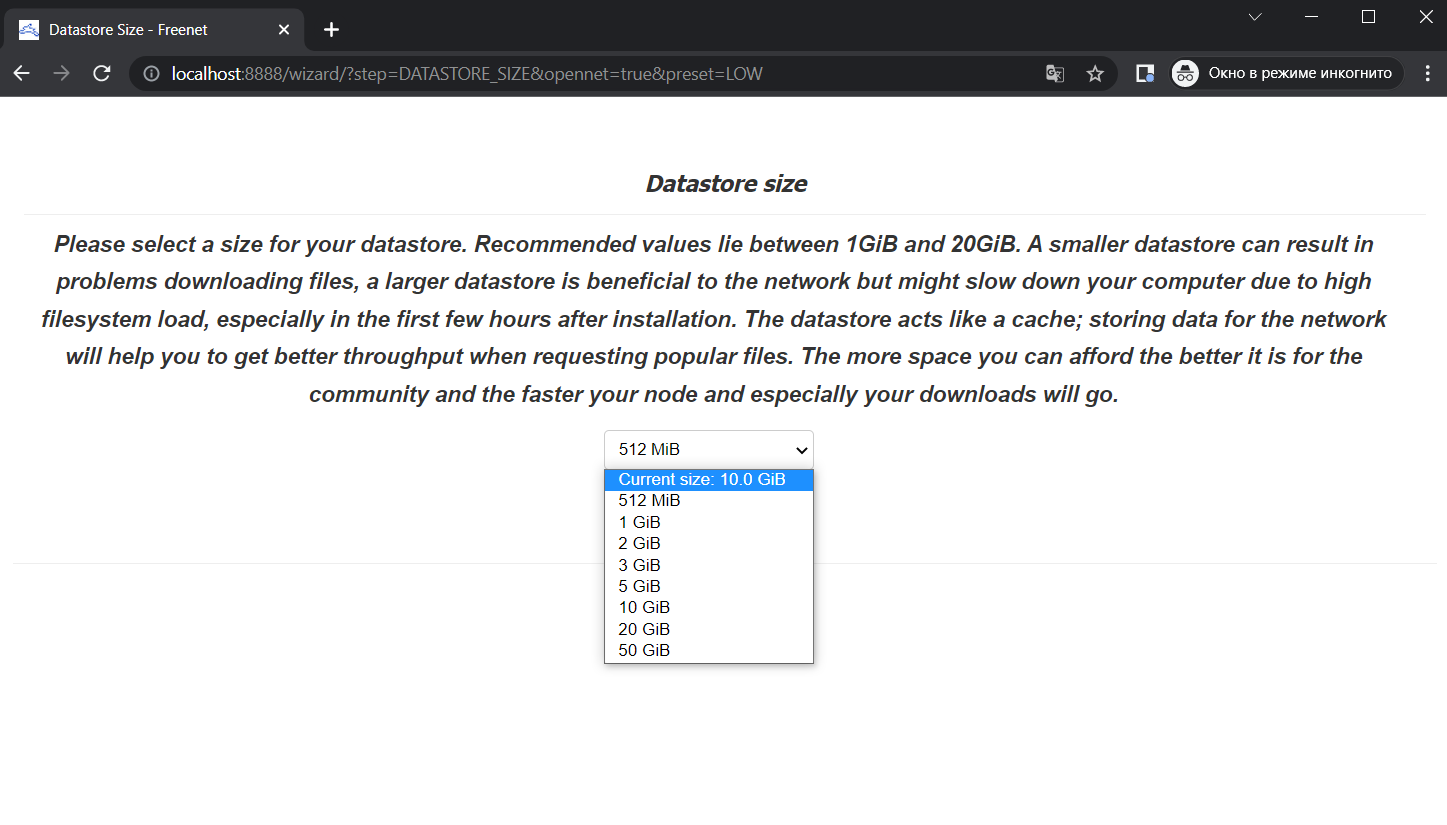
Choose your datastore size in the range from 0.5 to 500 GiB for downloading and sharing files. The larger the datastore, the faster sites will open in Freenet.
-
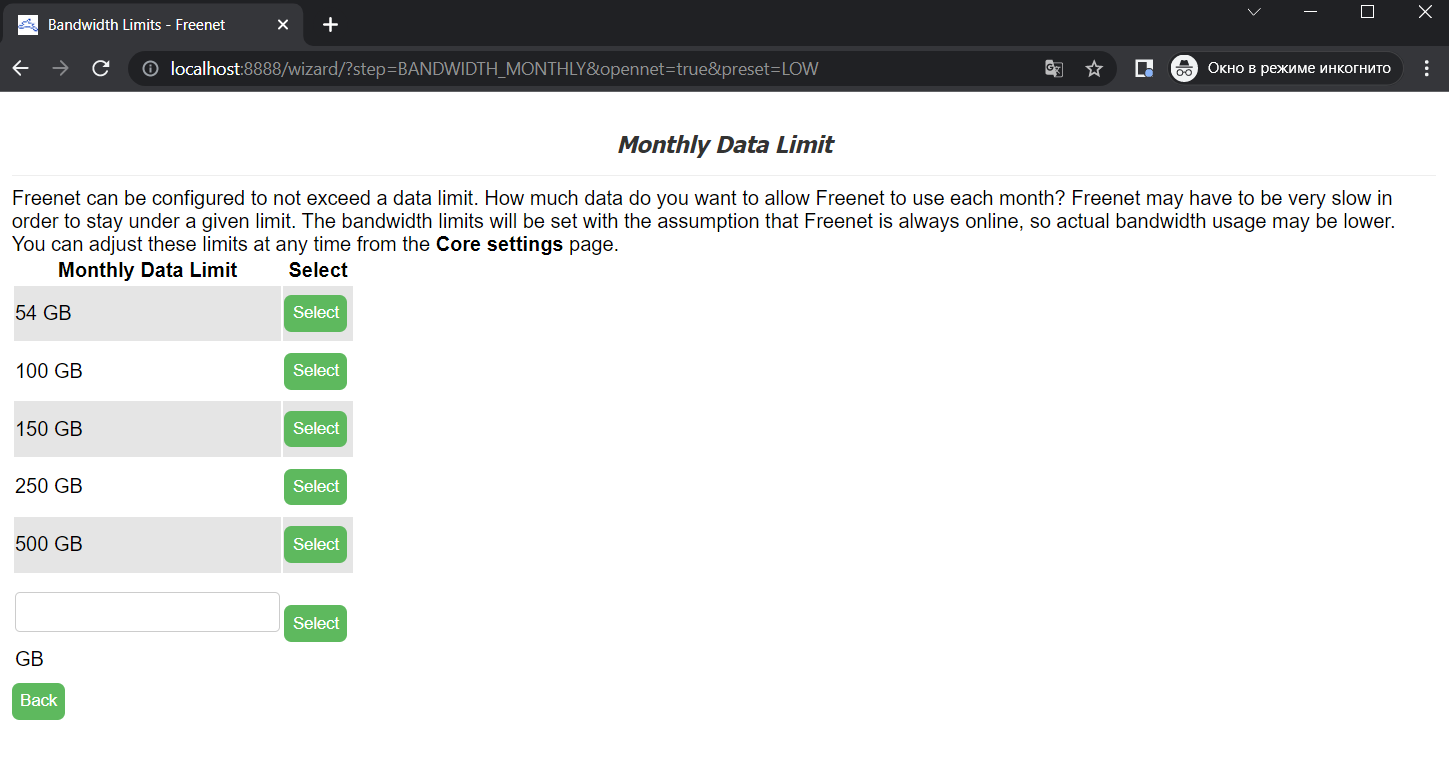
Set your monthly data limit. You can select a value from the list or specify your value.
You can also configure Freenet at a later time. To do so, you will have to start the Freenet client again or enter “http://127.0.0.1:8888/” in the address bar.
To access Freenet, you will need a Tor-capable browser. Any browser will do, except Internet Explorer — with the latter, the network may be unstable. For greater security, set your browser to incognito mode.
Once you start Freenet, you will see the home page with a list of sites on the network. You can access any site and enjoy your secure Tor internet.
You can find out more about the Freenet configuration procedure on the official website.
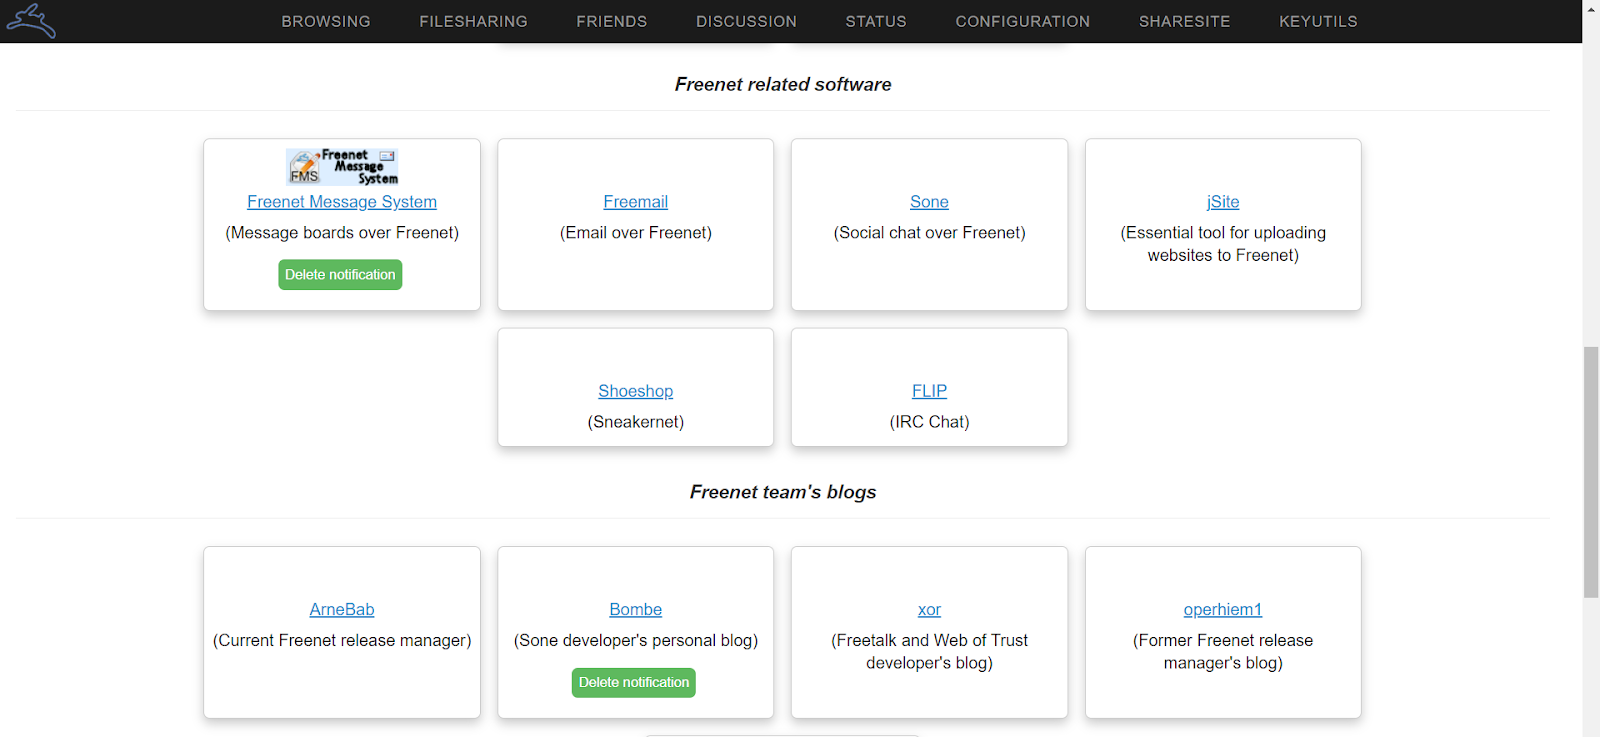
What is out there in Freenet
Freenet has various sites with the usual functionalities: messengers, bulletin boards, email and other utilities.
Messengers
Freenet Message System (FMS). In this system, users publish “trusted” lists, and each user accesses messages either from the nodes he/she trusts or from those trusted by the nodes he/she trusts.
Frost helps share files anonymously. Frost can be downloaded from the home page or from its free website in Freenet.
Sone is similar to Facebook and supports anonymous discussions, photo sharing and messaging.
Utilities
jSite is a tool for searching websites in Freenet.
Infocalypse helps to receive new data with less requests and download them without having the owners’ private keys.
Libraries
FCPLib is a set of C++-based functions that help store data in and retrieve data from Freenet. FCPLib supports Windows NT/2K/XP, Debian, BSD, Solaris and macOS.
FLIC is a library for instant messaging over Tor and Freenet. It can serve as the server part for low latency messaging systems.
You can also configure an anonymous mailbox in Freenet. For setup instructions, follow this link. Anonymous mailboxes are used to send website access keys to certain users.
How to access I2P
To gain access to I2P, you need to download the client from the official site or from GitHub. The application runs under macOS, Windows, Linux, Debian, Ubuntu and Android. You will also need to install the latest version of Java. At this moment, that’s Java SE 17.
It’s better to install I2P on a VPS, and that’s for three reasons:
-
You won’t have your anonymity compromised. Because of the IP change, the ISP won’t know you’re running I2P.
-
VPS is always online → its network map is always large, so I2P will run faster and generate fewer errors.
-
Hackers will have a harder time finding out that you are using I2P because the client is running on a server rather than on your computer.
I2P installation for Windows
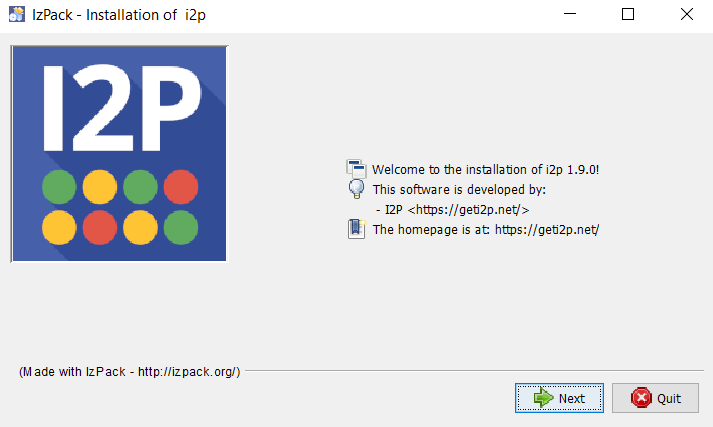
When the installation is complete, run the client and go to http://127.0.0.1:7657/ in your browser. The client will set the default settings, and you can enjoy your secure internet.
The user can configure the network on his/her own.
Network setup for Chromium-based browsers
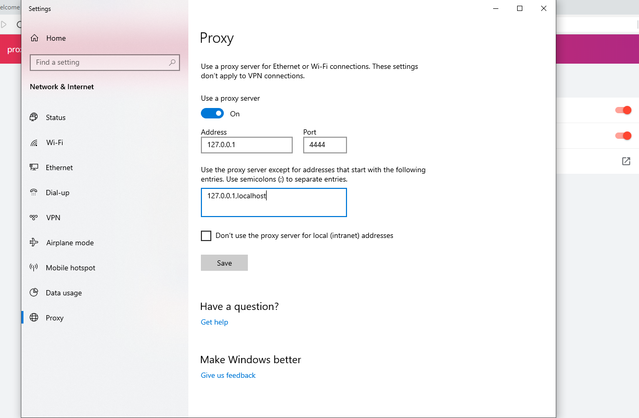
Access Start → Settings → Network & Internet. In the opening menu, select Proxy → Use a proxy.
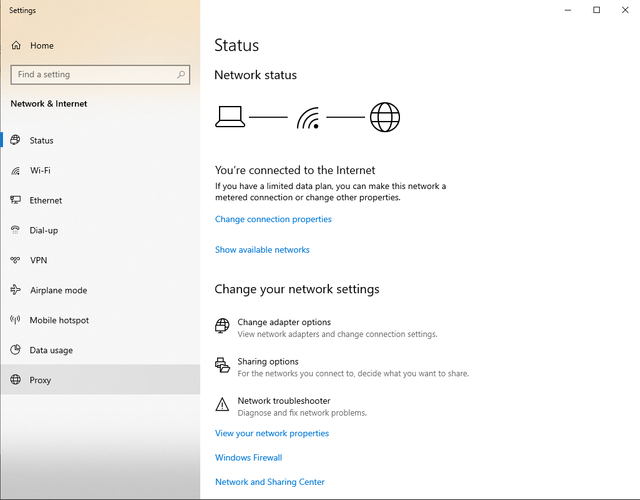
When you pull the “Use a proxy server” slider bar, the port configuration screen will open. Enter “127.0.0.1” in the Address field and “4444” in the Port field for HTTP or “4445” for HTTPS.
Network setup for Mozilla
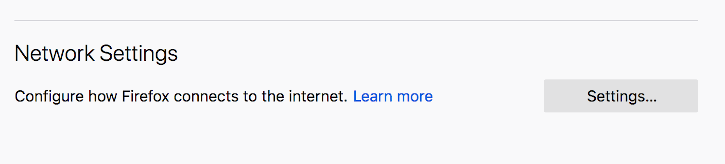
Start the browser and go to Settings → Network Settings.
Select Manual proxy configuration, type “127.0.0.1” in the HTTP Proxy and SSL Proxy fields and “4444” in the Port fields.
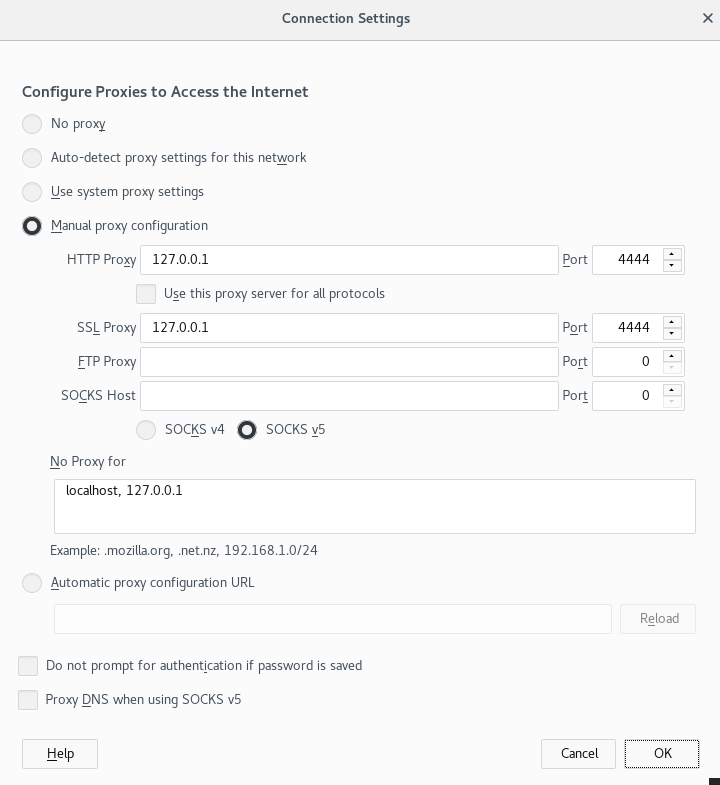
If you are configuring Mozilla Firefox for I2P, type “about:config” in the search box, then find “media.peerConnection.ice.proxy_only” in the new search box and set the value at True.

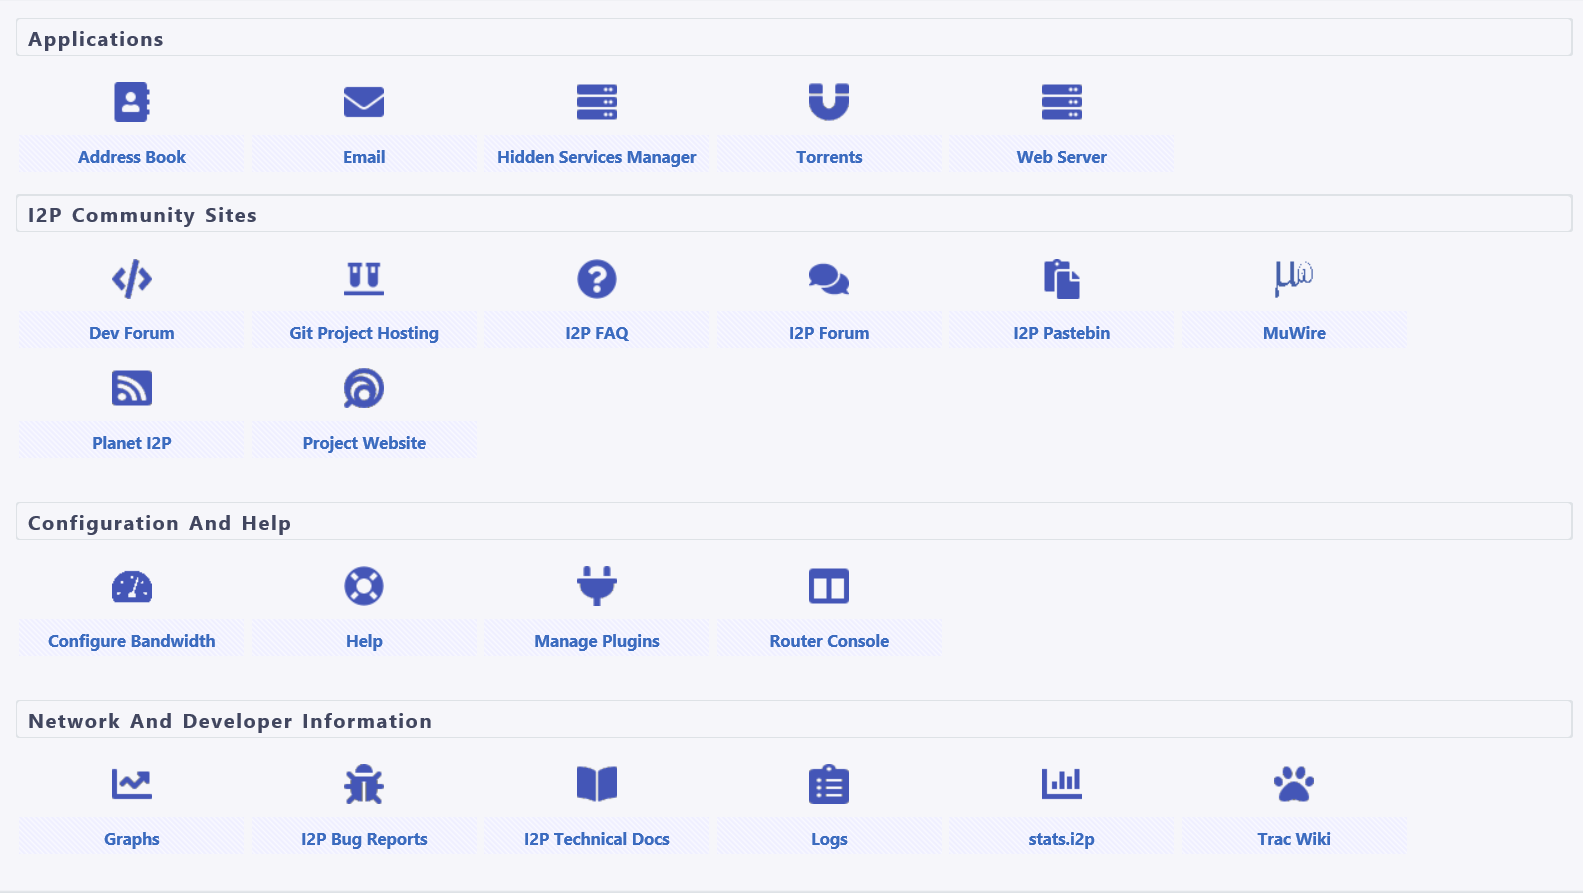
Now you are ready to start using your secure internet. You can start by accessing the project’s official site mirror or any other site for that matter. For useful links, access Router Console.
I2P installation for macOS
Download the installation file from the official site, run it and accept the license agreement. Then drag the I2P icon on top of the Applications icon and start I2P from Finder.
Once you start I2P, the program’s icon will appear on the Dock panel, and the I2P console page will soon open in the browser. It will prompt you to finish the configuration in automatic mode.
To view hidden sites, you will need the Mozilla browser. Its configuration is the same as under Windows.
I2P installation for Linux
First download the installation file from the official site. Then, there are two options for installation.
Option 1: installation from the terminal: java -jar i2pinstall_1.9.0.jar. This will start the GUI installer. You can start the installer by clicking twice on the file “i2pinstall_1.9.0.jar” or by clicking the right button of the mouse and selecting “Open with Java”.
Option 2: installation from the command line. This option is suitable for servers, containers or certain virtual machines. To install I2P from the command line, type “java -jar i2pinstall_1.9.0.jar -console”.
Alternatively, you can download the out-of-the-box browser with preconfigured I2Pd — at the very start, it will display the homepage with links to sites.
What is out there in I2P
I2P can be used in a variety of ways and is not limited to websites only. You can host any web resources in I2P — forums, message boards, git repositories, blogs or personal one-page websites. It is very feasible to implement turn-based network games that do not require low-latency packet transmission, such as chess or cards.
The only limitation is the data transmission speed within the network.
Proprietary search engines. In I2P, there are proprietary search engines, such as Legwork.i2p or Ransack.i2p. They work basically the same way as the regular search engines like Google. The only difference is that Legwork searches for i2p sites only, while Ransack aggregates information from such search engines as Google, DuckDuckGo, Qwant etc.
Blogs and forums. In I2P you can create your own blog(s) and share your thoughts with readers. One notable blog is Exotic Security — its author talks about network security and discusses useful features for programmers. And an example of a forum is Hidden Answers — there, you can talk to people on different topics.
Book websites. In I2P, there is a mirror of Flibusta, the largest pirated literature website. There are also narrower themed book sites, such as Fantasy worlds.
File sharing sites. There are several file sharing sites in I2P, which are mirrors of the regular internet websites. For example, there are mirrors of RuTor and Public Torrent Tracker; the file sharing site Serien is also gaining traction.
Online stores. I2P also has its own marketplaces where all sorts of things are traded. But we will not provide links to such sites.
How to access the Dark Web via Tor
To access the Dark Web, you will need Tor Browser, a VPN connection and the links to your desired sites in Tor. Instructions are provided below.
-
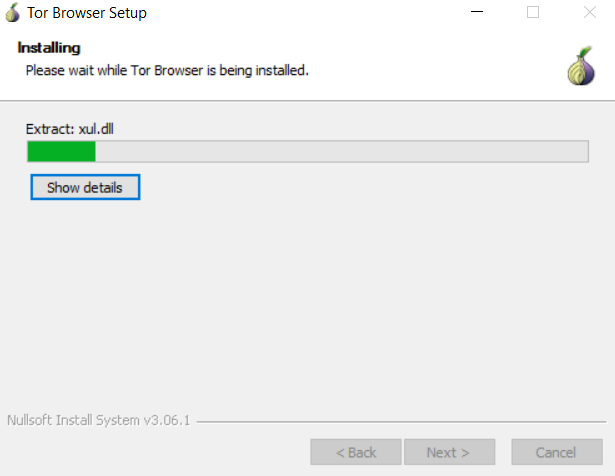
Download the anonymous Tor Browser from the official site and install it.
Enable VPN for added security with Tor browser. To find out more about what VPN is and how it works, check out our article on VPN.
-
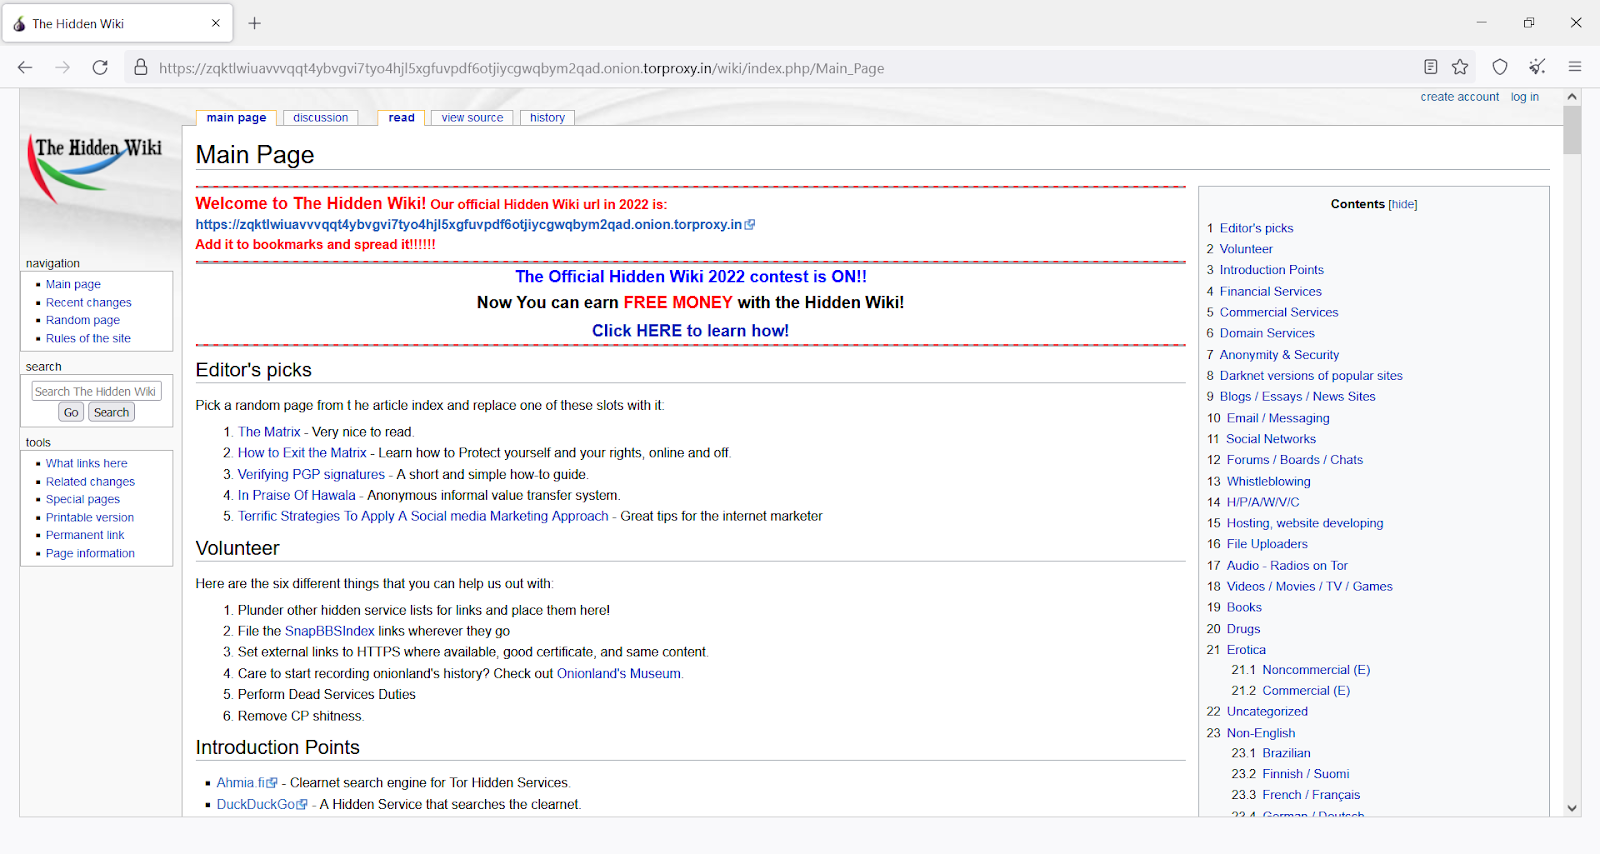
Enter your desired link in Tor browser’s search box and access the website. If you don’t know the address, search for it on The Hidden Wiki — this Darknet Wiki project provides links to other websites. Note that this link will only open in Tor Browser.
Instead of Tor Browser, you can use the Windows Expert Bundle, which wraps all outgoing traffic in onion encryption. Its downside is that it greatly reduces the speed of the internet. So, Tor Browser is a better option for accessing the Dark Web.
What can you do in the Dark Web via Tor
Some people use Tor as they would use the regular internet, and others use it to do illegal things. We will not tell you about the latter, but will show you a couple of popular services and sites for secure web surfing in Tor browser.
Social media. There is not much sense in using regular social networks on darknet, because it is virtually impossible to register anonymously with them — anyone would be able to connect your account to the real person. So, here are several links to alternative sites and services:
-
Cyph messenger is the Tor alternative to Skype with support of video chats and file transfer.
-
Facebook is the Tor version of the regular Facebook.
-
Hidden Answers is a Tor analog of the Stack Overflow website. There, you can anonymously ask questions about hacking, security, online privacy etc.
Email services. Regular emails are not secure, as they can be tracked or hacked. On the Dark Web, there are alternative email services that use Tor encryption and hide your emails from third parties. For your anonymous and secure Tor-based email, use Mail2Tor, ProtonMail or CTemplir.
Hosting services. In Tor, there are hundreds of sites where you can store personal files under protection. It's secure because the Tor network creates multiple layers of encryption for your files and internet connection.
Here are some Tor hosting services:
-
Daniel Uploads is a Tor service for uploading files up to 10GB in size. The Tor uploads are visible to all Dark Web users.
-
Image Hosting is a free Tor-based image hosting service supporting PHP, MySQL and PHPMyAdmin. It offers encrypted storage for personal files. The maximum storage size is 2GB.
-
More hosting services: МЕГАТор, SecureDrop, BlackCloud.
Other useful resources. For reading news, there is a Tor analog of The New York Times. Use ExpressVPN for your Tor-based VPN connections. Books with and without copyright are available in Tor Browser at Comic Books, Imperial and Z-Library.
Last but not least, here are some Tor aggregator sites with links to other resources:
-
Daniel's onions — a database of 7000 addresses.
-
Fresh Onions — a catalog of 5000 unique addresses.
-
Onionsoup — a list of dozens of online services.
-
Not Evil — a search engine listing over 32 million links to .onion addresses.
-
Torch — a Tor search engine listing 450,000 links
-
Tor Onionland — a search engine containing some 5 million pages and 57 thousand sites.